Guaranteeing webhook delivery in Strapi using QStash
Today we will look at how to automatically retry your Strapi webhooks using QStash.
Strapi is a very popular open-source content management system in the javascript ecosystem. It allows you to customize almost everything about your CMS and comes with a lot of features to make your work as easy as possible. Today we will be looking at Strapi's integrated webhooks, to send a message on certain conditions A webhook is just an HTTP request to another server that gets automatically sent whenever some data in Strapi changes. For example, you might want to call another API, when an editor publishes a new page, or when an entry is updated.
However there is one shortcoming, that could cause some issues: Strapi could send a webhook to your API, but it crashes or fails to perform the action successfully. There is no retry mechanism, it simply sends the webhook once and forgets about it.
This is where Upstash QStash comes in: QStash is a serverless message queue, capable of handling retries and guaranteeing successful delivery to your API. The best part is, that you can use serverless functions to process your messages, because QStash also sends a webhook to your API, just like Strapi would do.
You don't need to pay anything, the free tier includes 100 requests per day!
Let's build something
In order to focus on the interesting parts, we will use a mock for the API, there are various free services for this and we will be using requestcatcher.com today. It allows us to easily see what payloads are sent. For production, we have a dedicated section about how you should secure your webhook API and quickstarts for popular frameworks.
API
Head over to requestcatcher.com and create a new
unique endpoint, I chose https://strapi-qstash.requestcatcher.com/test, and
keep the tab open.
Strapi
If you don't have a Strapi project yet, you can create one using
npx create-strapi-app@latest
npx create-strapi-app@latest
? What would you like to name your project? my-strapi-project
? Choose your installation type Quickstart (recommended)
Creating a quickstart project.

// logs omitted

One more thing...
Create your first administrator 💻 by going to the administration panel at:

┌─────────────────────────────┐
│ http://localhost:1337/admin │
└─────────────────────────────┘
npx create-strapi-app@latest
? What would you like to name your project? my-strapi-project
? Choose your installation type Quickstart (recommended)
Creating a quickstart project.
// logs omitted
One more thing...
Create your first administrator 💻 by going to the administration panel at:
┌─────────────────────────────┐
│ http://localhost:1337/admin │
└─────────────────────────────┘After you have created your admin account, go to http://localhost:1337/admin/settings/webhooks/create and fill in the form to create a webhook.
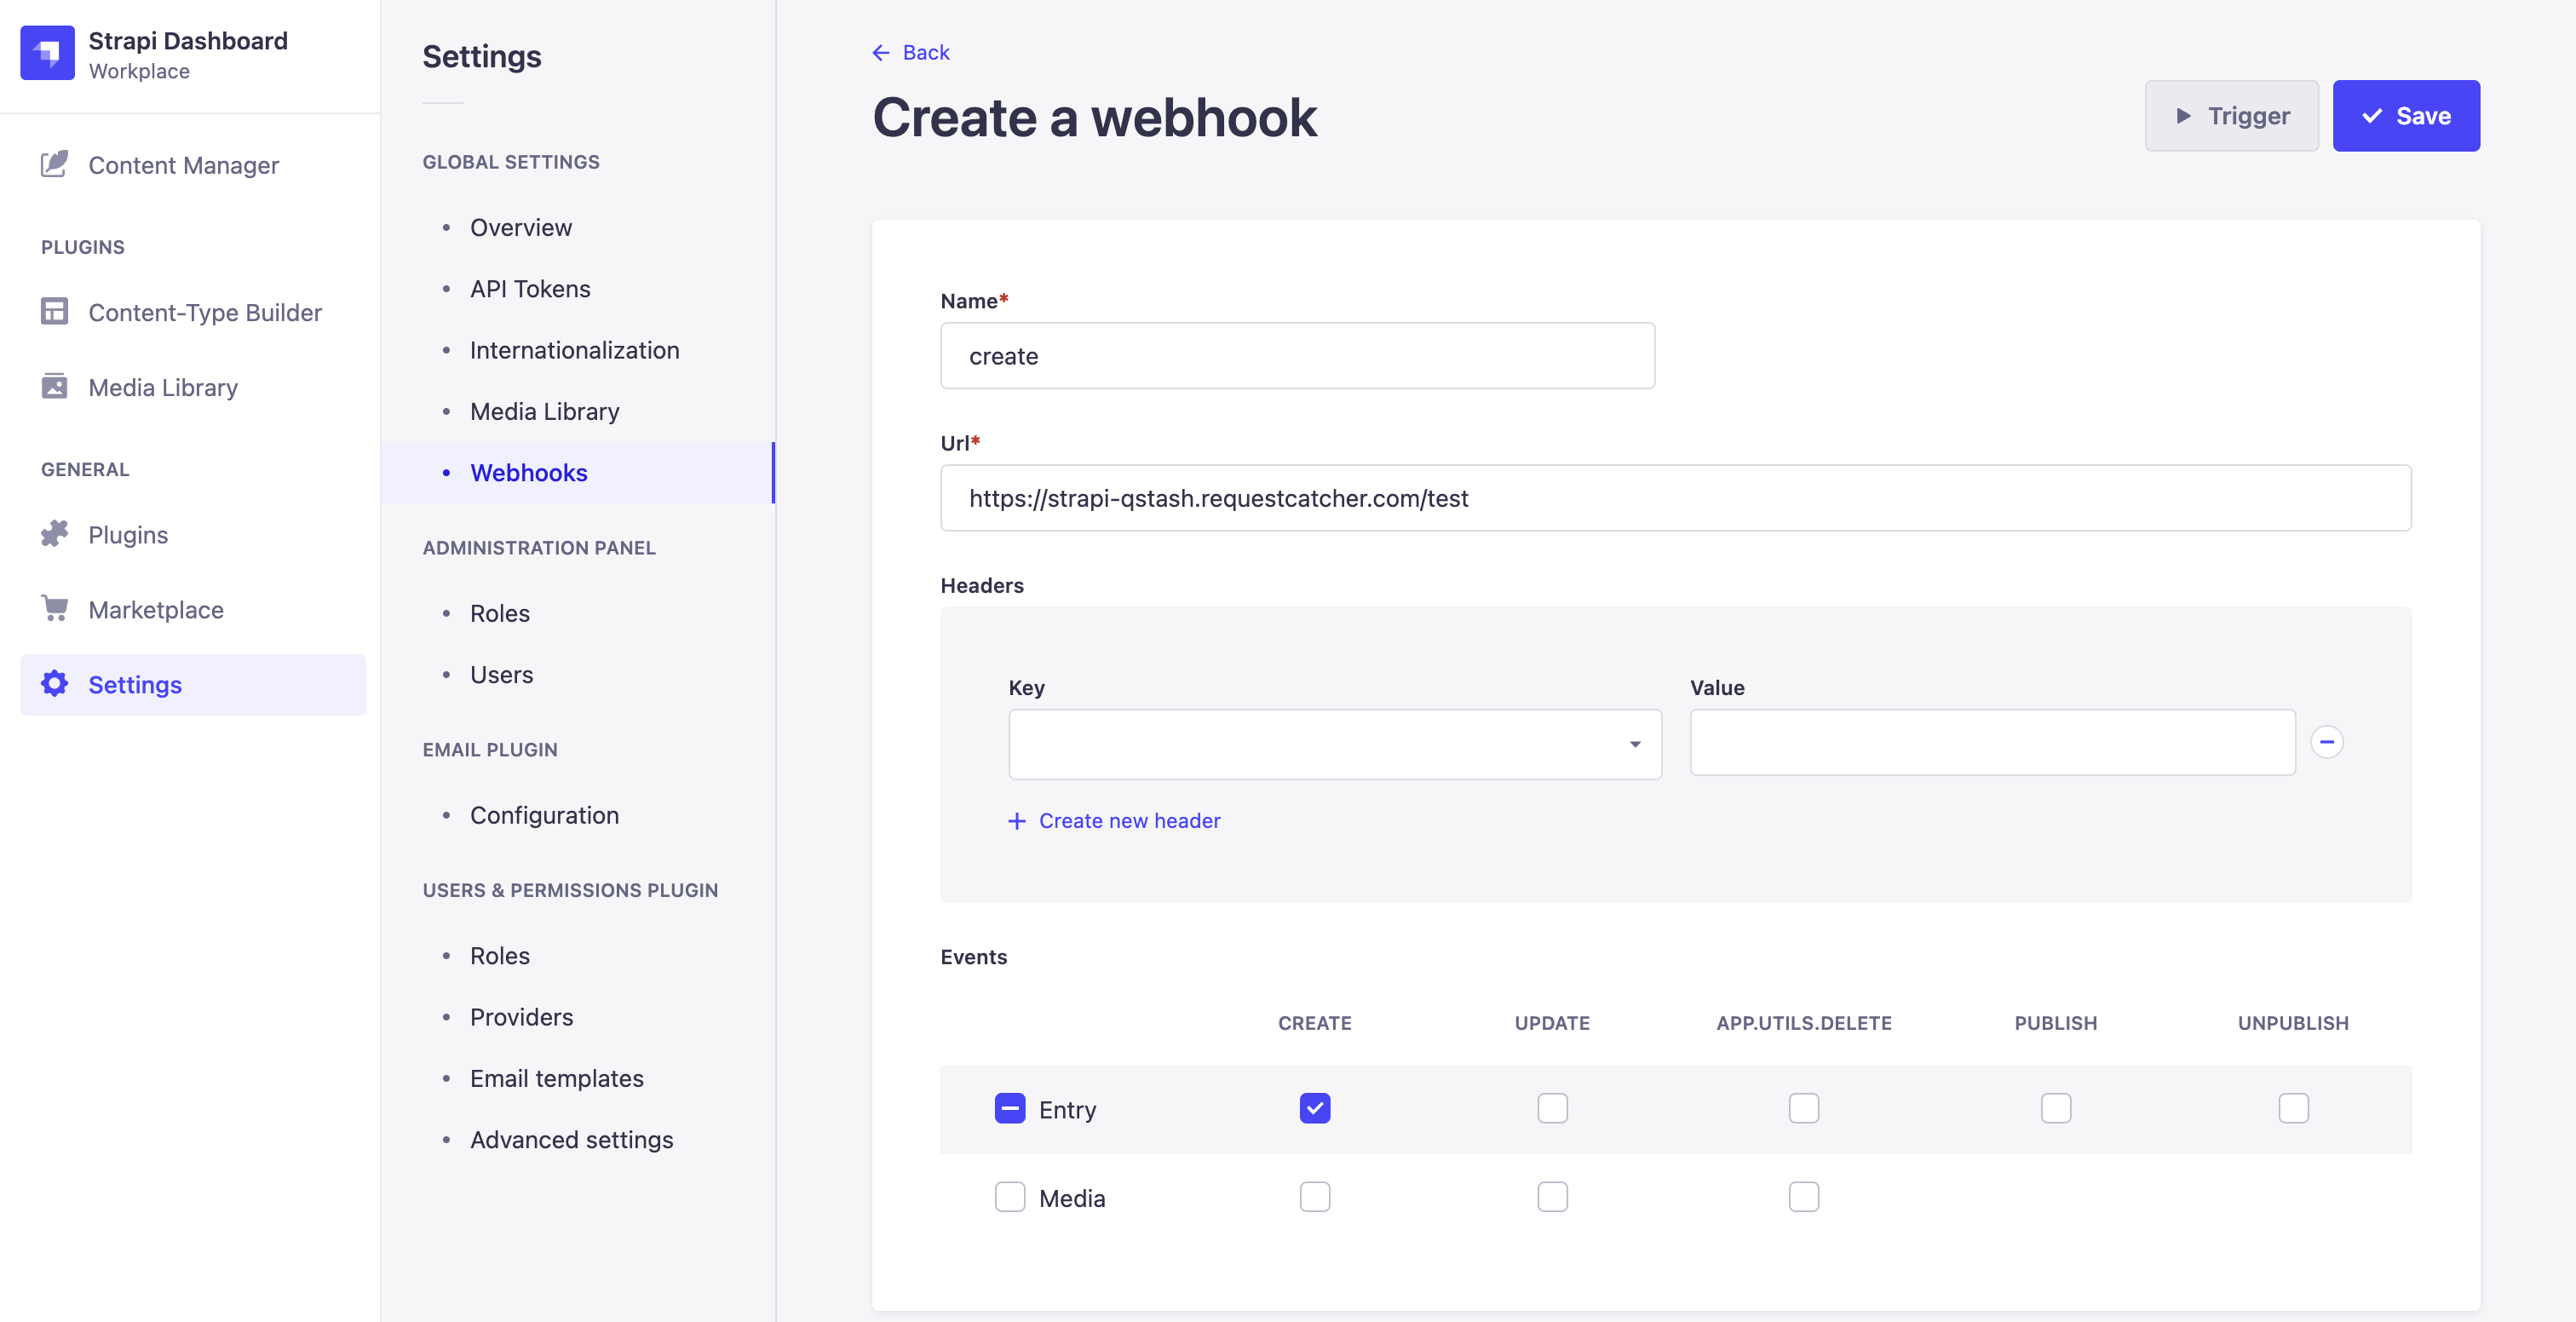
Click Save and then Trigger to test it.
On the request-catcher tab, you should see a new event with the following body:
{ "event": "trigger-test", "createdAt": "2022-08-29T08:46:44.400Z" }{ "event": "trigger-test", "createdAt": "2022-08-29T08:46:44.400Z" }Everything is working now, but as I mentioned in the beginning, there is no error handling or retrying if the API goes down. Let's fix that in the next step:
QStash
Head over to console.upstash.com/qstash and create an account if you haven't yet.
- Make a note of the
QSTASH_TOKENhere, you will need it later.
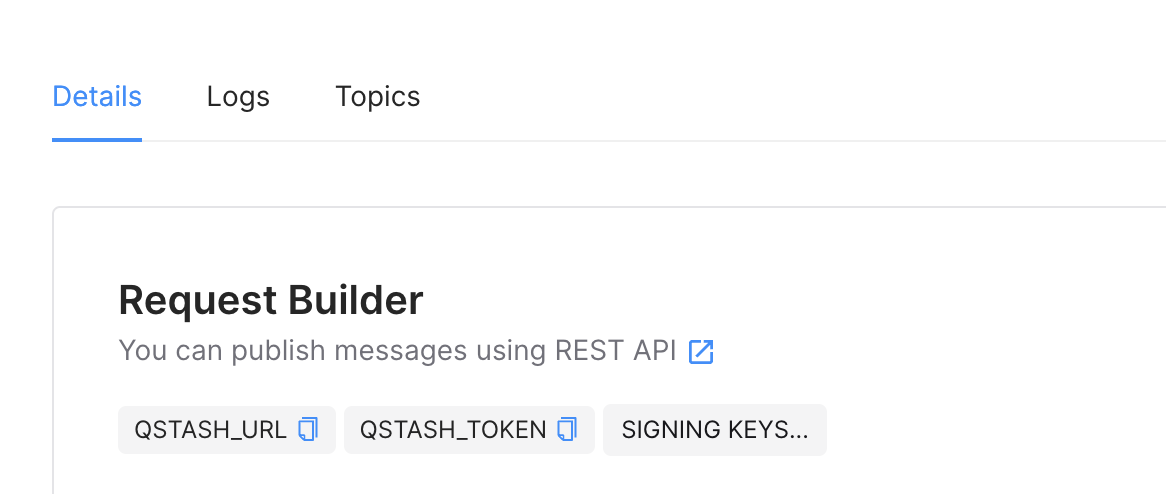
- Click on
Topicsand create a new one by giving it a descriptive name.
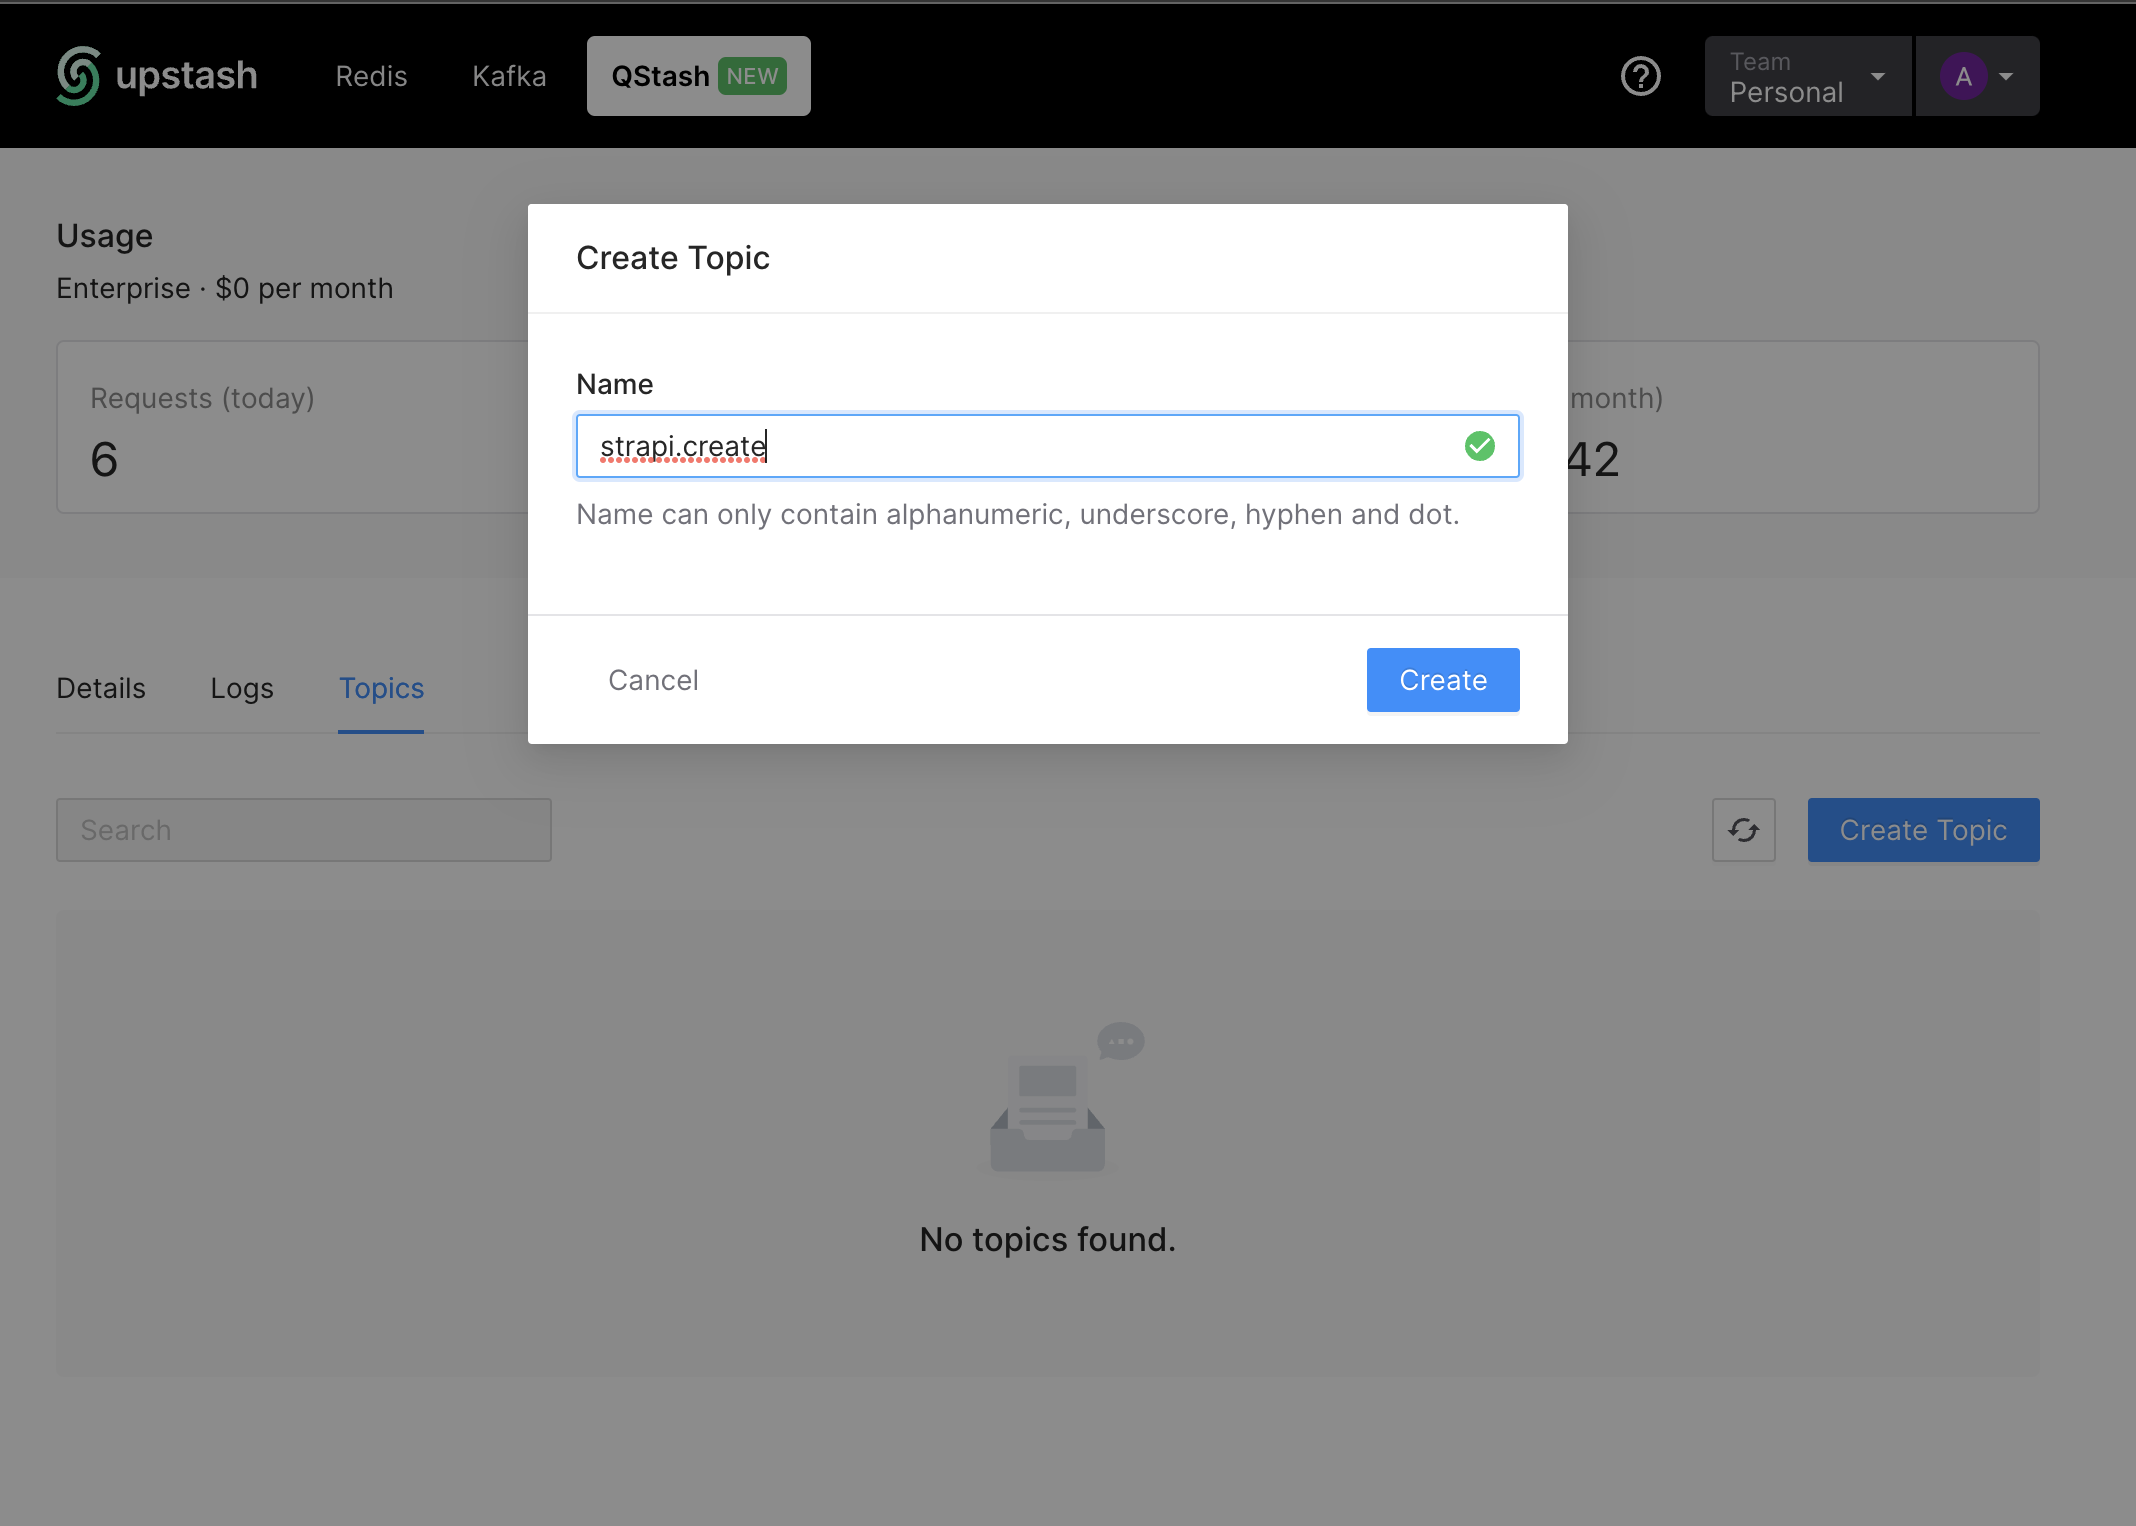
- After the topic is created, add your API endpoint like this:
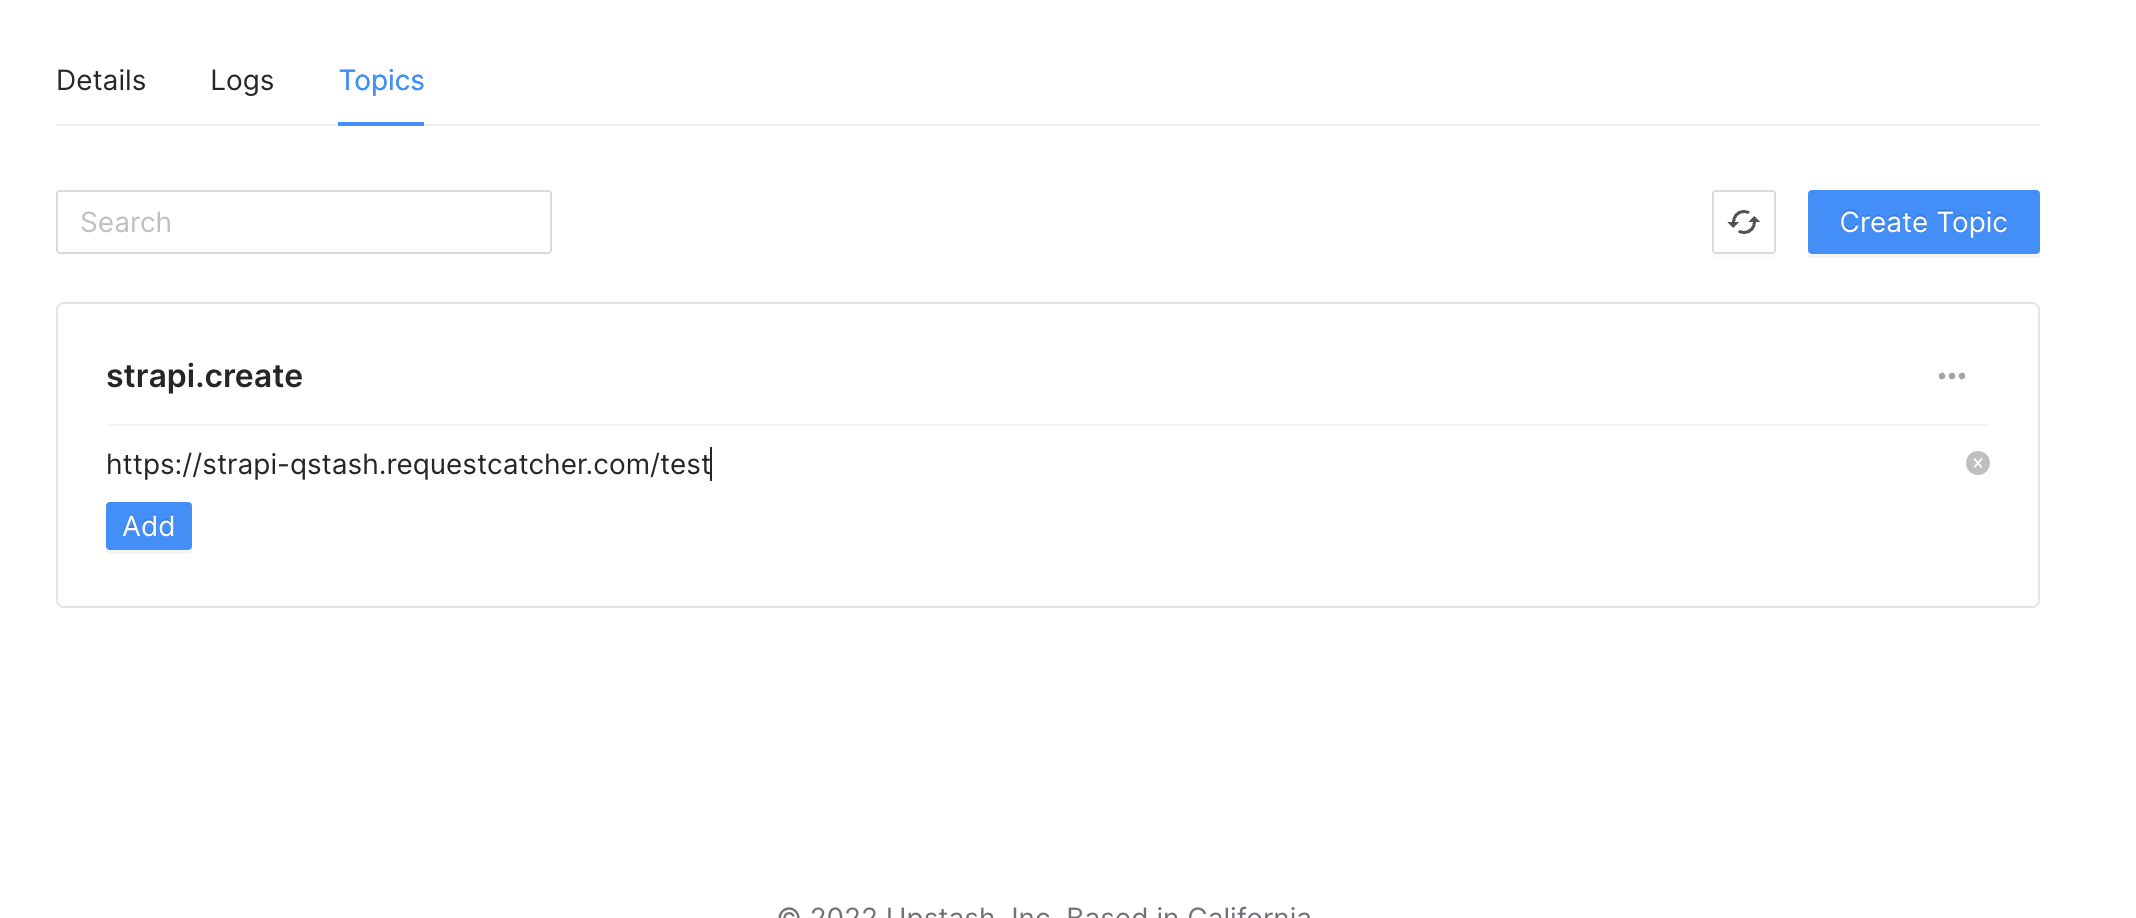
If at any point in the future you want to send the same event to another API, you can just add a second endpoint and we will deliver all events to both endpoints.
-
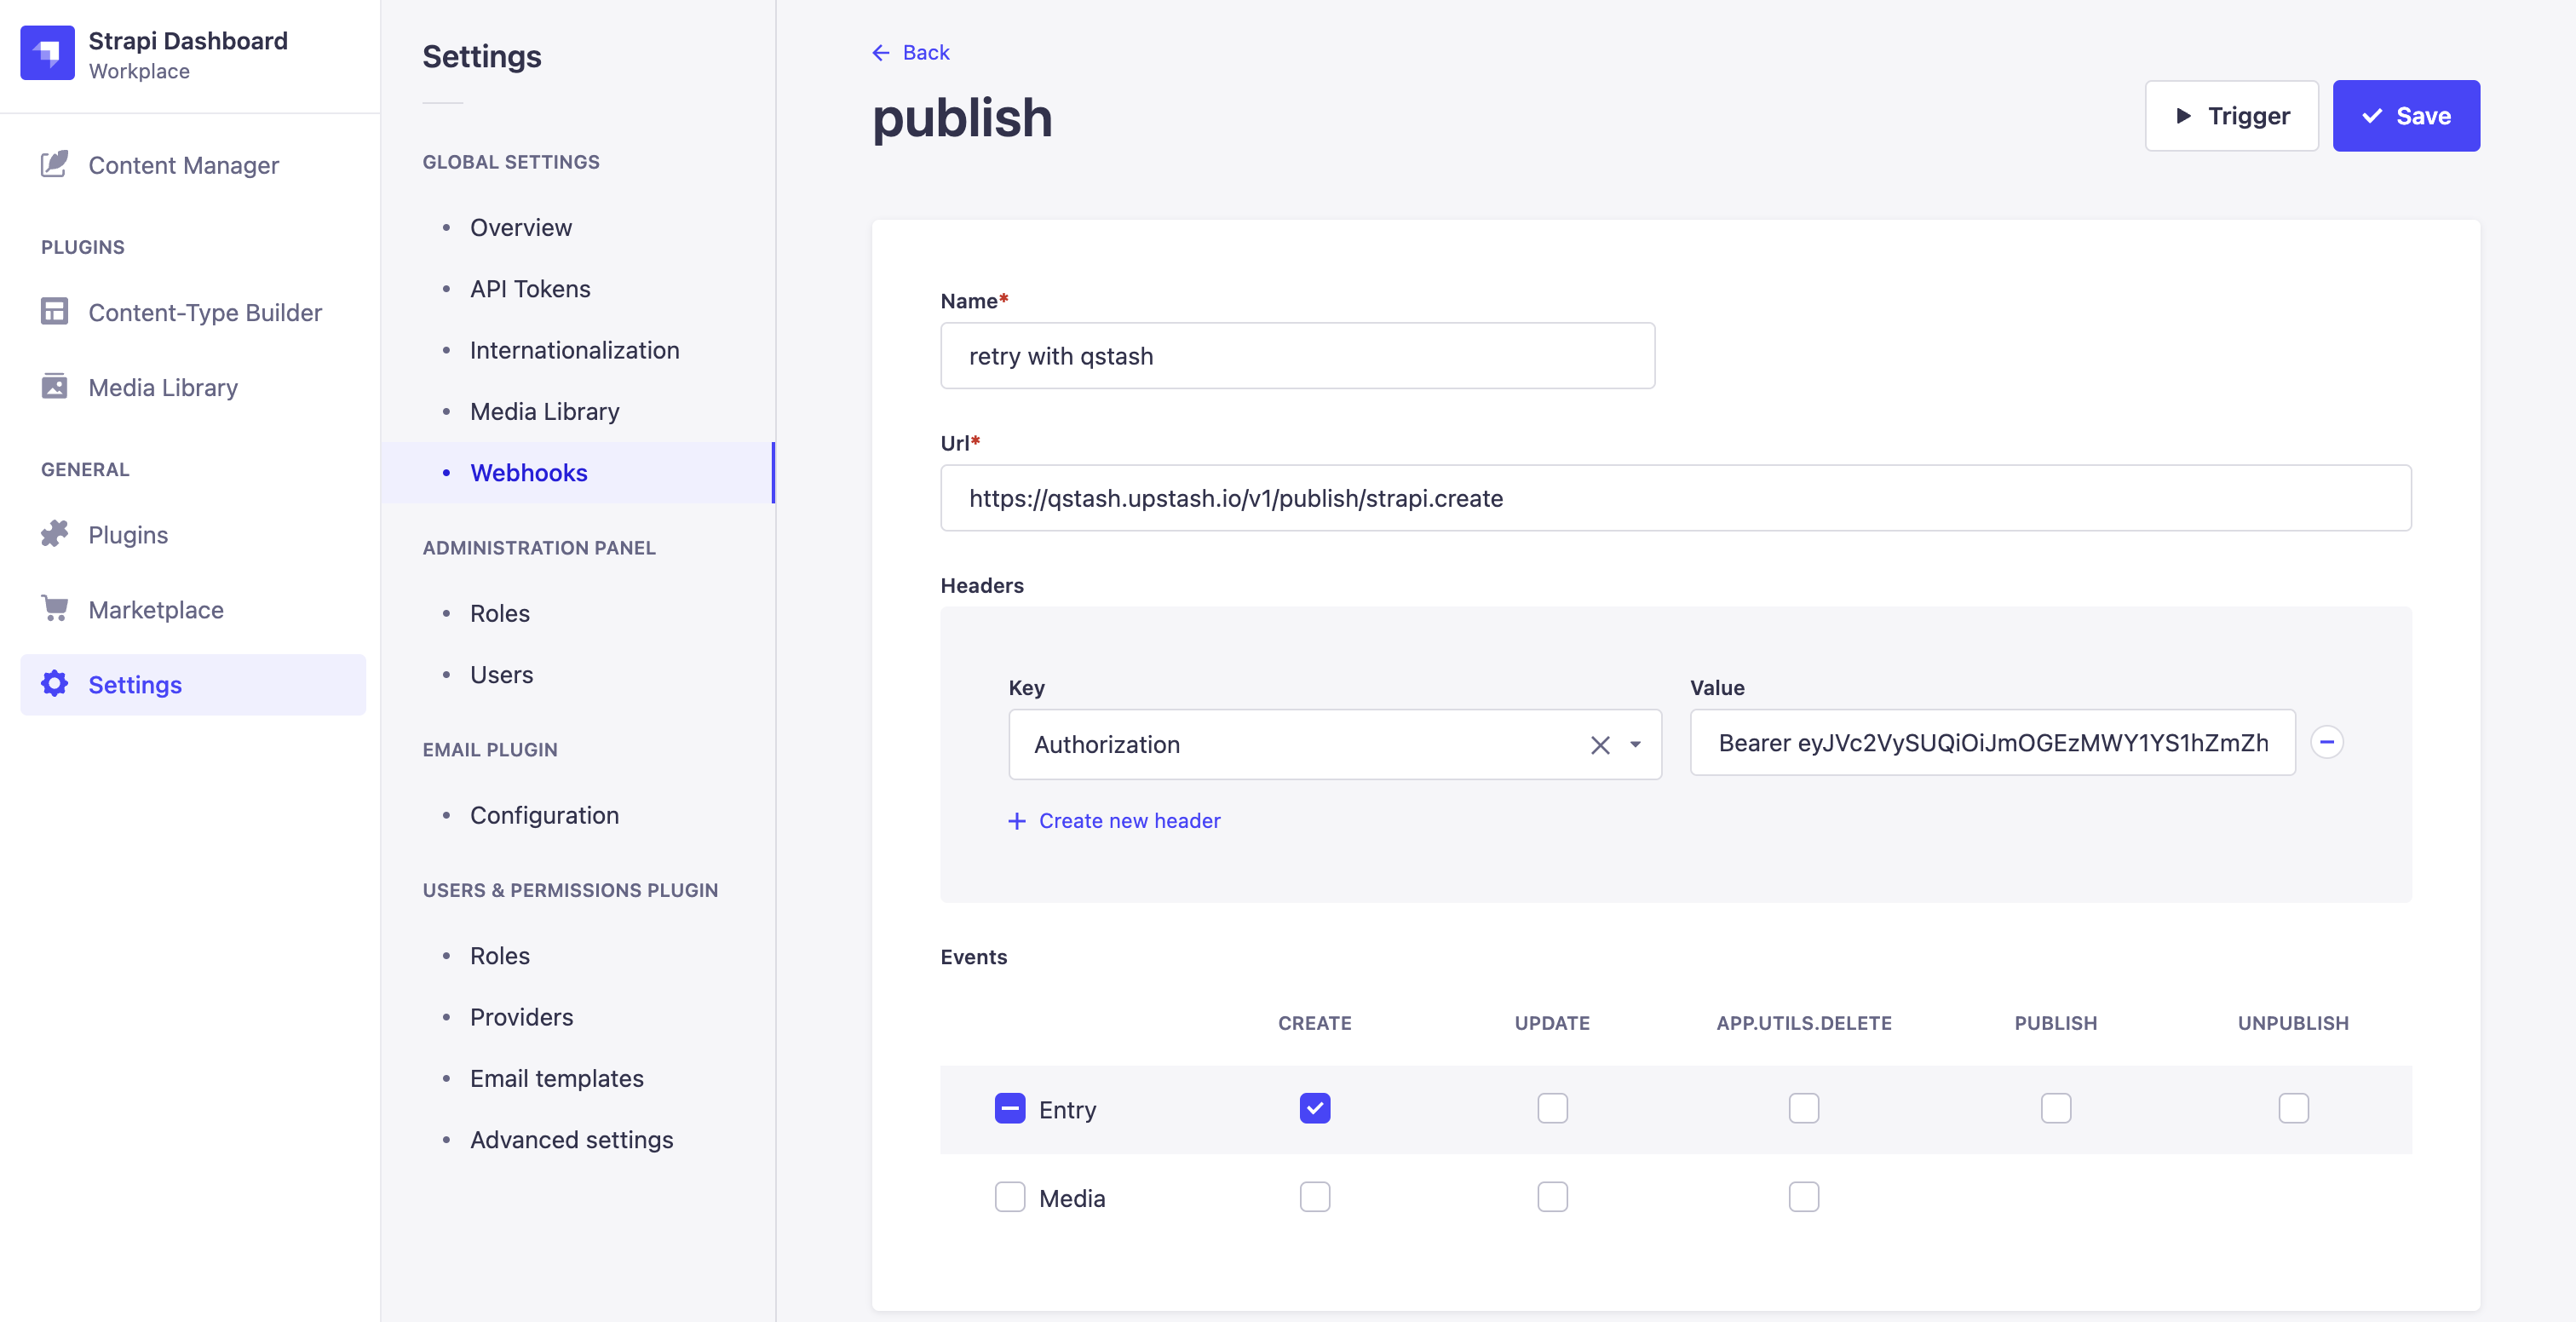
Now go back to Strapi to update our webhook to use QStash.
-
Replace the URL with https://qstash.upstash.io/v1/publish/strapi.create
-
Add the
QSTASH_TOKENfrom earlier asAuthorizationheader withBearerprefix. -
Click
Save
- Create a new entry of any content type
After a second or two you should see the event logged in requestcatcher:
{
  "event": "entry.create",
  "createdAt": "2022-08-29T11:36:10.463Z",
  "model": "my-model",
  "entry": {
    "id": 1,
    "my-field": "abc",
    "createdAt": "2022-08-29T11:36:10.457Z",
    "updatedAt": "2022-08-29T11:36:10.457Z",
    "publishedAt": null
  }
}
{
"event": "entry.create",
"createdAt": "2022-08-29T11:36:10.463Z",
"model": "my-model",
"entry": {
"id": 1,
"my-field": "abc",
"createdAt": "2022-08-29T11:36:10.457Z",
"updatedAt": "2022-08-29T11:36:10.457Z",
"publishedAt": null
}
}What is happening behind the scenes?
Strapi is now sending the webhook to QStash and using the QSTASH_TOKEN to
authenticate the request. QStash will then send the webhook to all endpoints,
that are subscribed to the created topic and retry delivery in case the endpoint
does not return a 2XX HTTP status code.
From now you no longer have to worry about losing webhooks in case your API is temporarily down for updates, not reachable over the network or some unforeseen error occured. By default we are retrying failed messages a couple of times with increasing exponential backoff. You can check out the details here.
Next steps
In production you should verify the authenticity of incoming webhooks using the signature, we generate for each message. You can use our typescript sdk @upstash/qstash or check out /docs/qstash/features/security to learn how to verify messages.
