Instant, interactive communication is crucial for satisfactory user experience. This is why many companies provide a live chatbox widget on their websites.
What it is
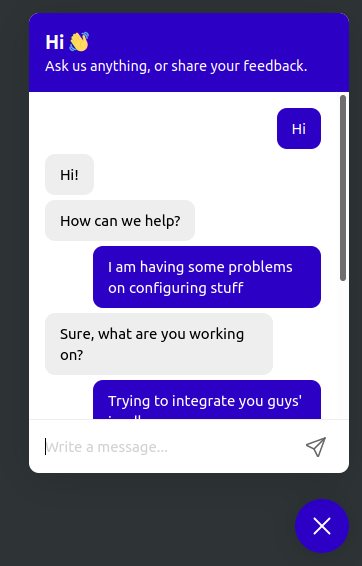
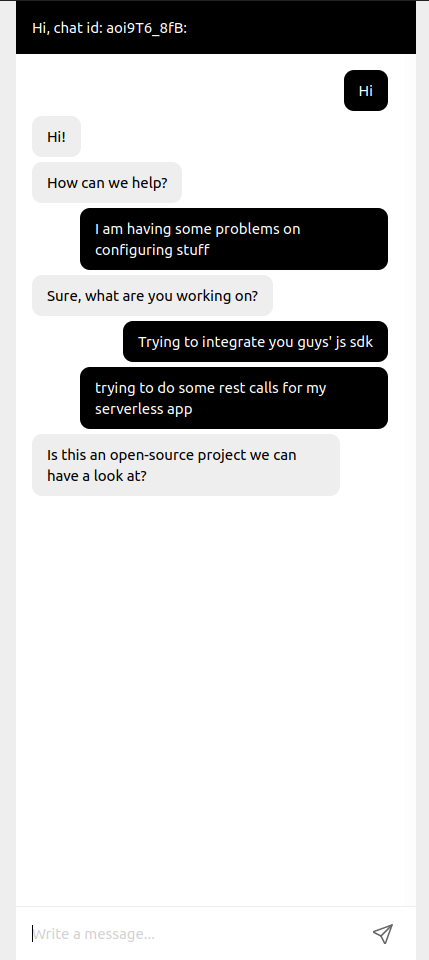
This is a chatbox widget, alongside with admin chat panel for websites, connecting users with developers/admins. This way, an interactive communication between peers can be established.
This project uses Next.js, alongside Upstash Redis for storage.
User initiates conversation

A notification for the newly initiated chat goes to Slack

Admins can reply

You can see the demo here.
Notice that chat id is shown in the console. Note that and go to /chat/{id} to see the admin panel and how both interfaces interact with each other.
1. Create Database and Environment Variables
The data will be kept at Upstash Redis.
Create a free Redis database at Upstash Console
Copy the .env.local.example file to .env.local (which will be ignored by
Git):
cp .env.local.example .env.localcp .env.local.example .env.localUPSTASH_REDIS_REST_URLandUPSTASH_REDIS_REST_TOKENcan be found at the database details page in Upstash Console.SLACK_WEBHOOK_URLcan be found at the Slack integration page in https://api.slack.com/messaging/webhooks
2. Install Package
yarn add @upstash/chatboxyarn add @upstash/chatbox3. Import CSS and Widget
// pages/_app.js

import "@upstash/chatbox/index.css";

import dynamic from "next/dynamic";

const ChatBoxWidget = dynamic({
  loader: () => import("@upstash/chatbox").then((mod) => mod.ChatBoxWidget),
  ssr: false,
});

export default function MyApp({ Component, pageProps }) {
  return (
    <>
      <ChatBoxWidget />
      <Component {...pageProps} />
    </>
  );
}
// pages/_app.js
import "@upstash/chatbox/index.css";
import dynamic from "next/dynamic";
const ChatBoxWidget = dynamic({
loader: () => import("@upstash/chatbox").then((mod) => mod.ChatBoxWidget),
ssr: false,
});
export default function MyApp({ Component, pageProps }) {
return (
<>
<ChatBoxWidget />
<Component {...pageProps} />
</>
);
}The options can be passed as React props
| key | type | default |
|---|---|---|
themeColor? | string | #2d00c6 |
textColor? | string | #fff |
title? | string | Hi 👋 |
description? | string | Ask us anything, or share your feedback. |
showOnInitial? | boolean | false |
customIcon? | React.ReactElement |
4. Admin Dashboard
// pages/chat/[id].js

import dynamic from "next/dynamic";

const ChatBoxAdmin = dynamic({
  loader: () => import("@upstash/chatbox").then((mod) => mod.ChatBoxAdmin),
  ssr: false,
});

export default function () {
  return <ChatBoxAdmin />;
}
// pages/chat/[id].js
import dynamic from "next/dynamic";
const ChatBoxAdmin = dynamic({
loader: () => import("@upstash/chatbox").then((mod) => mod.ChatBoxAdmin),
ssr: false,
});
export default function () {
return <ChatBoxAdmin />;
}5. Create API
// pages/api/chatbox/[...chatbox].js

import createChatBoxAPI from "@upstash/chatbox/api";

const ChatBoxAPI = createChatBoxAPI({
  webhooks: [process.env.SLACK_WEBHOOK_URL],
});

export default ChatBoxAPI;
// pages/api/chatbox/[...chatbox].js
import createChatBoxAPI from "@upstash/chatbox/api";
const ChatBoxAPI = createChatBoxAPI({
webhooks: [process.env.SLACK_WEBHOOK_URL],
});
export default ChatBoxAPI;Congratulations!
Now you have your own chatbox for users! Enjoy!
You can see the source code here and npm package here.
About this project or in general, we highly appreciate your feedbacks and ideas. If you want to give any feedback or thoughts on our services, you can do so via twitter or discord.
